These are instructions on how to rotate a movie or video clip using QuickTime Pro.
Step One
Launch QuickTime by clicking its icon in the dock or from Applications:Utilities.

Step Two
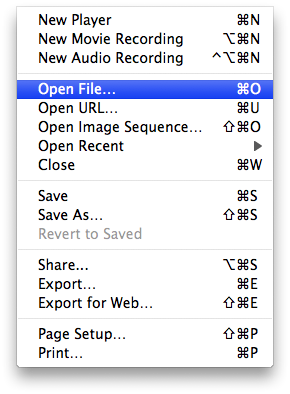
Select Open File.. from the File Menu
Step Three
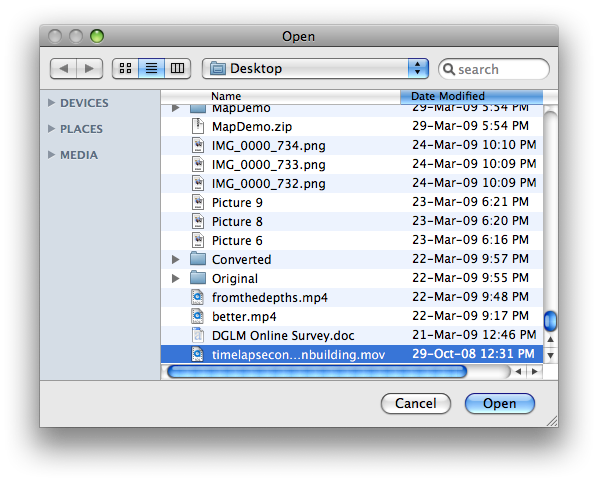
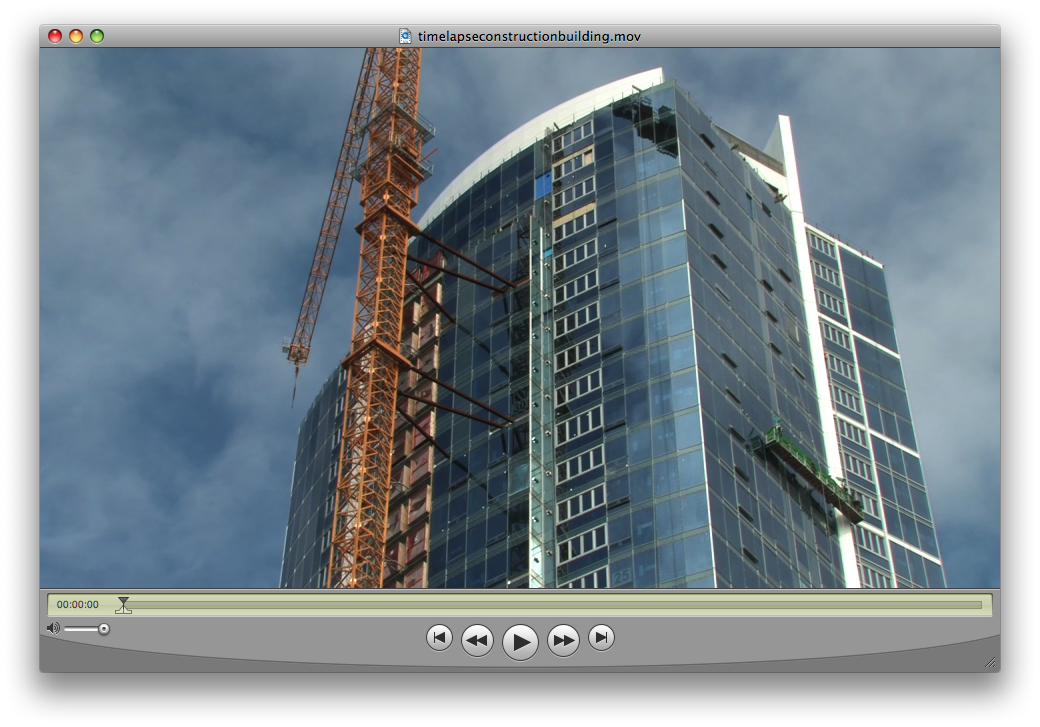
Select your video using the file finder dialog then click the Open button
Step Four
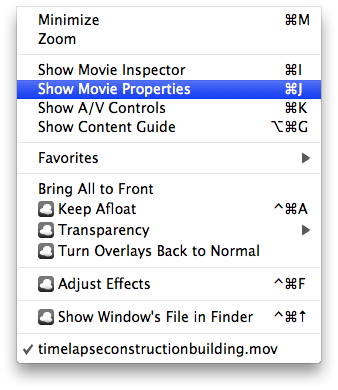
Select Show Movie Properties from the Window Menu
Step Five
Select Video Track from the list of tracks
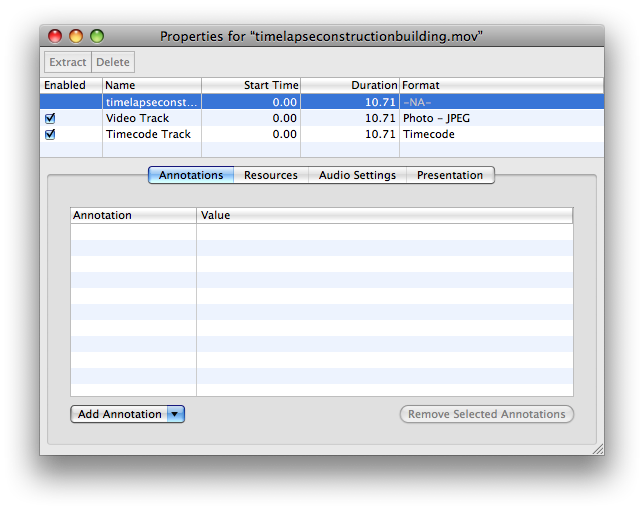
Step Six
Click one of the rotate icons that appears below

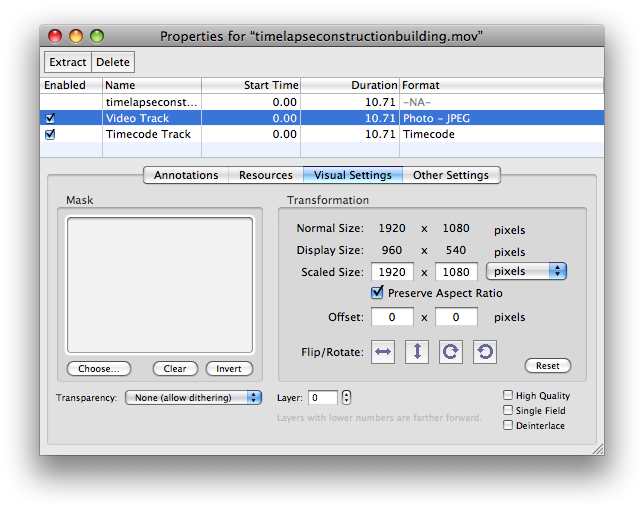
Step Seven
Notice your video clip has now been rotated...
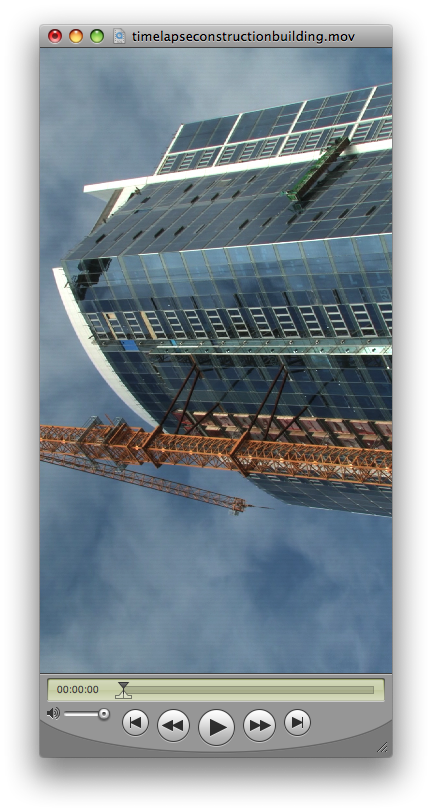
Step Eight
Select Save As from the File Menu.
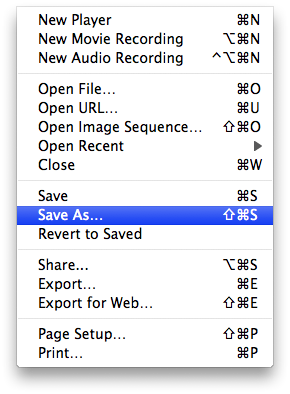
Step Nine
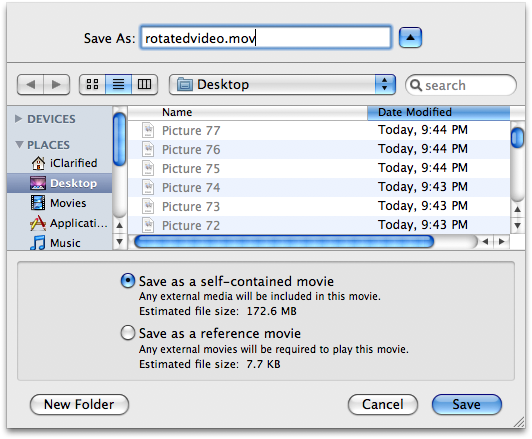
Make sure Save as a self-contained movie is selected, enter a name for the rotated clip and click the Save button.
Step One
Launch QuickTime by clicking its icon in the dock or from Applications:Utilities.

Step Two
Select Open File.. from the File Menu

Step Three
Select your video using the file finder dialog then click the Open button


Step Four
Select Show Movie Properties from the Window Menu

Step Five
Select Video Track from the list of tracks

Step Six
Click one of the rotate icons that appears below


Step Seven
Notice your video clip has now been rotated...

Step Eight
Select Save As from the File Menu.

Step Nine
Make sure Save as a self-contained movie is selected, enter a name for the rotated clip and click the Save button.


![OpenAI Releases GPT-4.5 [Video] OpenAI Releases GPT-4.5 [Video]](/images/news/96580/96580/96580-160.jpg)


![Powerbeats Pro 2 Heart Rate Tracking Fails in Fitness Tests [Video] Powerbeats Pro 2 Heart Rate Tracking Fails in Fitness Tests [Video]](/images/news/96573/96573/96573-160.jpg)
![Apple May Already Be Developing Next-Gen iPhone 17e [Rumor] Apple May Already Be Developing Next-Gen iPhone 17e [Rumor]](/images/news/96571/96571/96571-160.jpg)


![Apple M4 Max 16-inch MacBook Pro (48GB RAM, 1TB SSD) On Sale for $435 Off [Deal] Apple M4 Max 16-inch MacBook Pro (48GB RAM, 1TB SSD) On Sale for $435 Off [Deal]](/images/news/96576/96576/96576-160.jpg)
![New Apple M4 Mac Mini On Sale for $549 [Deal] New Apple M4 Mac Mini On Sale for $549 [Deal]](/images/news/96553/96553/96553-160.jpg)
![Anker Announces New Sale: Up to 52% Off Smart Scales, Speakers, and More! [Deal] Anker Announces New Sale: Up to 52% Off Smart Scales, Speakers, and More! [Deal]](/images/news/96542/96542/96542-160.jpg)
![Apple AirTag Four-Pack Hits New All-Time Low Price of $67.99 [Deal] Apple AirTag Four-Pack Hits New All-Time Low Price of $67.99 [Deal]](/images/news/96537/96537/96537-160.jpg)
![Apple 13-inch M2 MacBook Air (16GB RAM) On Sale for $799 [Deal] Apple 13-inch M2 MacBook Air (16GB RAM) On Sale for $799 [Deal]](/images/news/96295/96295/96295-160.jpg)