To sideload an app onto your iPhone, open its project in Xcode on your Mac, sign in to your Apple Account in Xcode's settings, choose your Personal Team under Signing & Capabilities, pair your iPhone and click Run. Then trust the developer on your iPhone in Settings > General > VPN & Device Management.
A free Apple Account is enough. The app stops opening after seven days, and you can have three apps installed this way at a time; click Run again to keep using it.
We sideloaded Mini vMac, a classic Mac emulator that isn't on the App Store, onto an iPhone 18 Pro Max running iOS 27 from a MacBook Pro with Xcode 27. Xcode is free on the Mac App Store.
Install an App on iPhone From Its Source Code With Xcode
Step One: Download the App's Source Code
Click Spotlight in the menu bar, type Terminal and press Return.

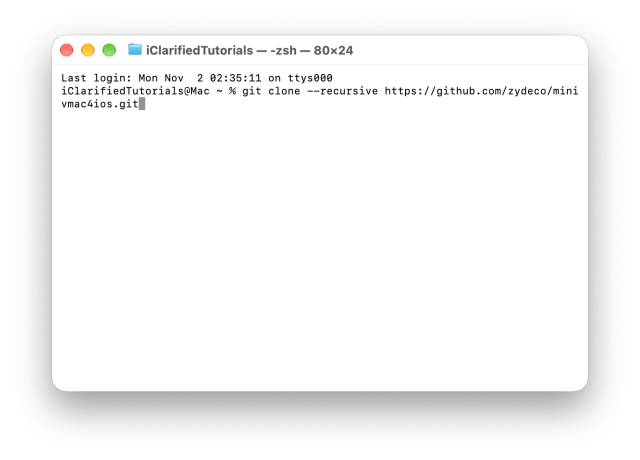
Type git clone --recursive followed by the app's GitHub address and press Return. For Mini vMac:
git clone --recursive https://github.com/zydeco/minivmac4ios.gitThe --recursive option also downloads the other projects the app needs. Xcode's own clone and GitHub's ZIP download leave them out, so the project won't build.
Step Two: Open the Project in Xcode
Open the project file in Xcode: double-click it in Finder, or type this in Terminal and press Return:
open "minivmac4ios/Mini vMac.xcodeproj"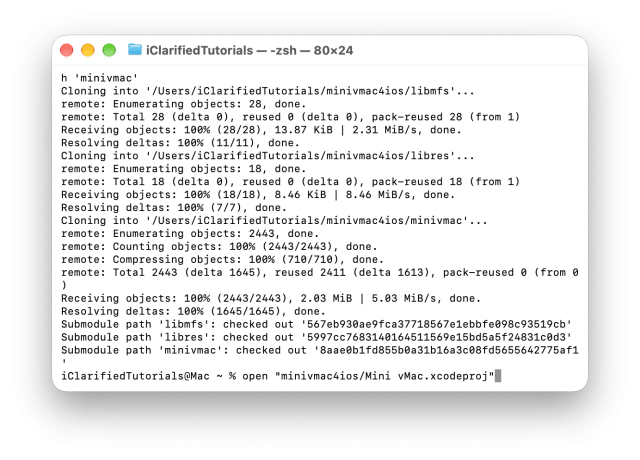
Step Three: Sign In to Your Apple Account in Xcode
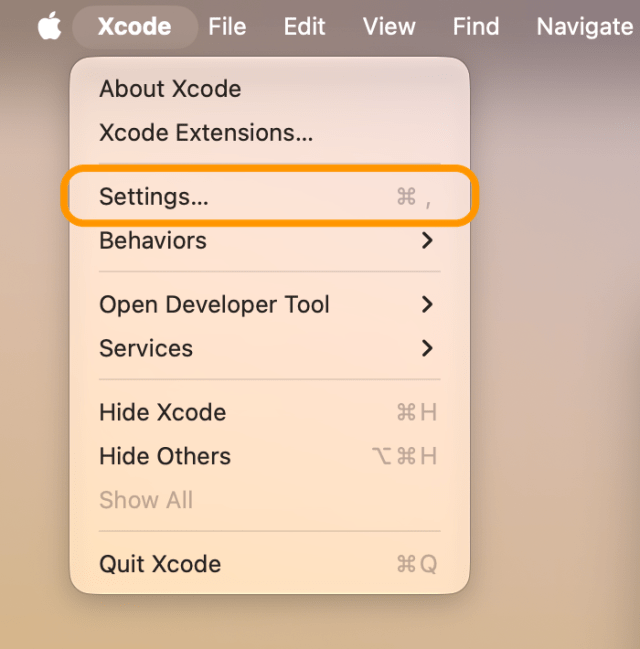
Click Xcode in the menu bar and choose Settings….

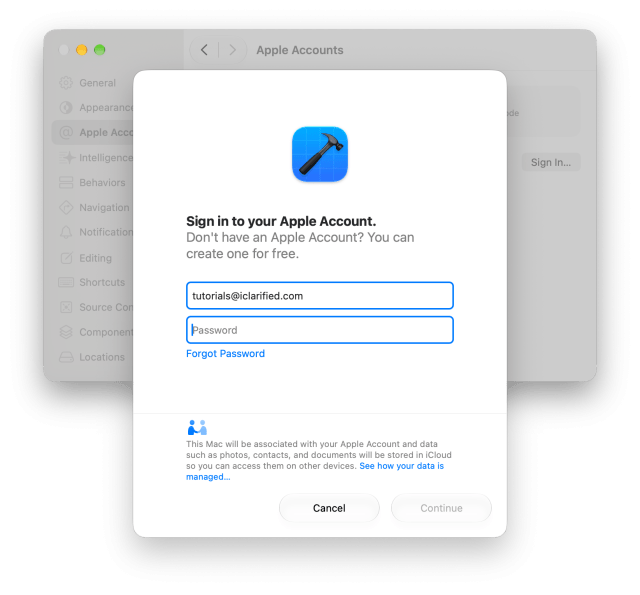
Click Apple Accounts, then Sign In….
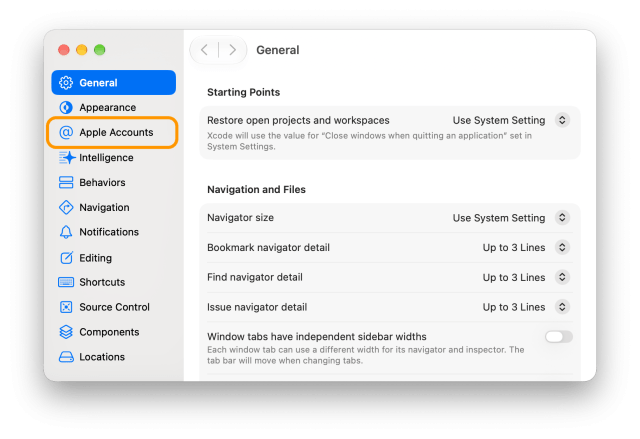
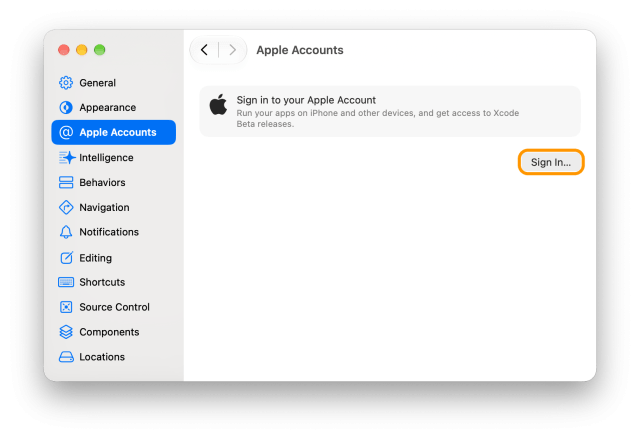
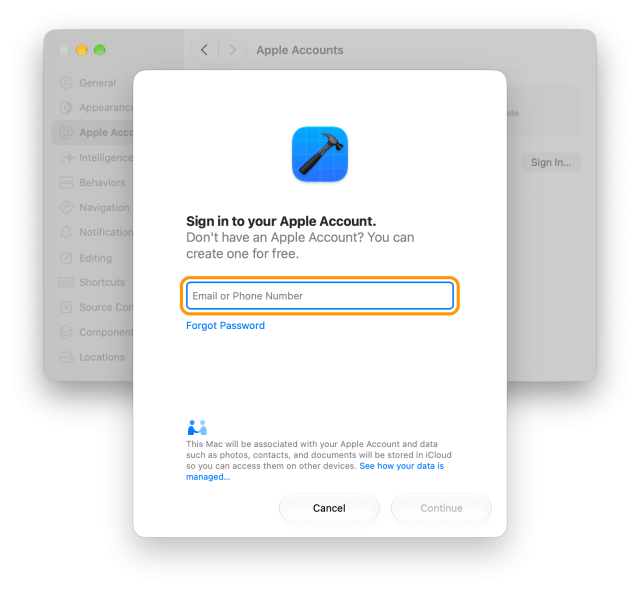
Enter your Apple Account email, click Continue and enter your password.
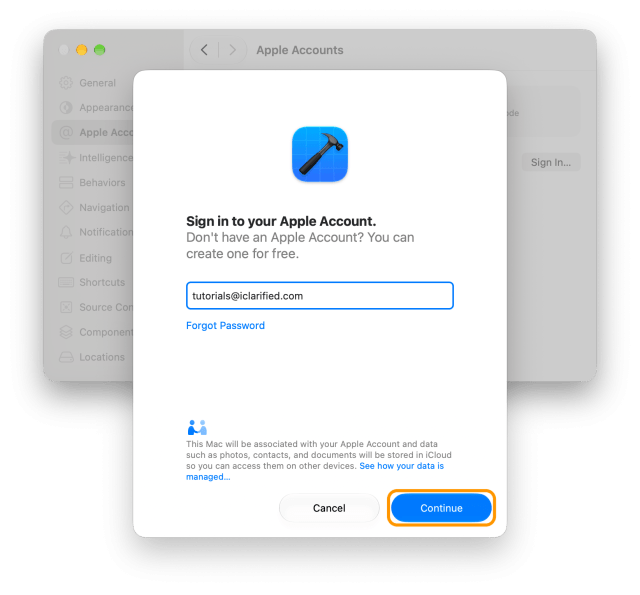
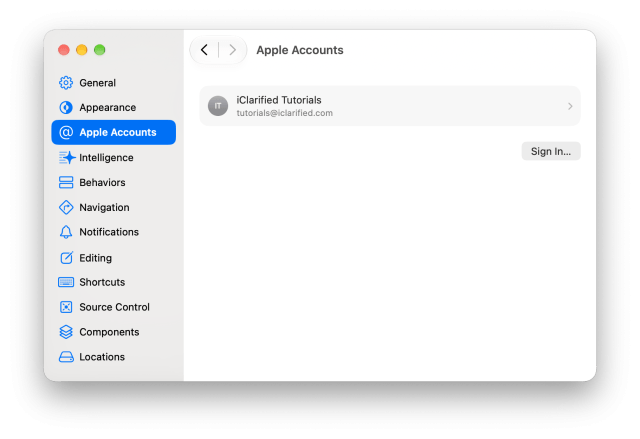
Your account appears under Apple Accounts. Close Settings.
Step Four: Choose Your Personal Team
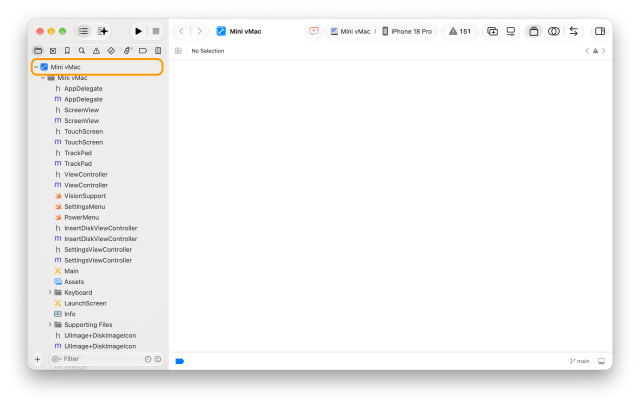
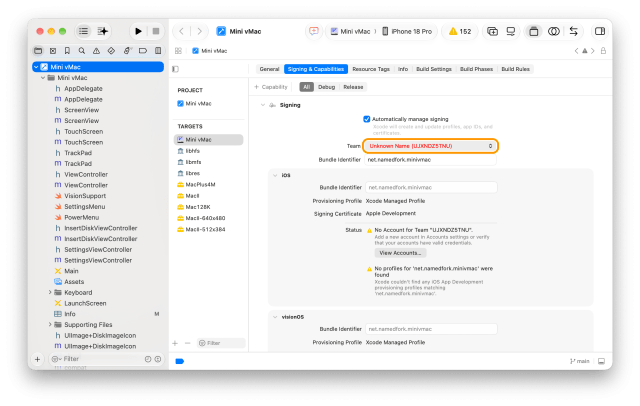
Click the project at the top of the sidebar, then Signing & Capabilities.
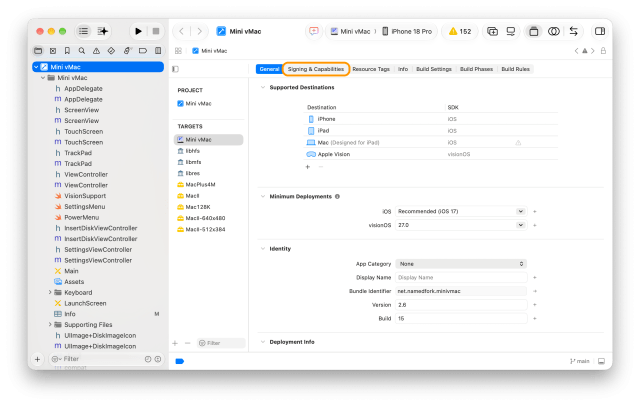
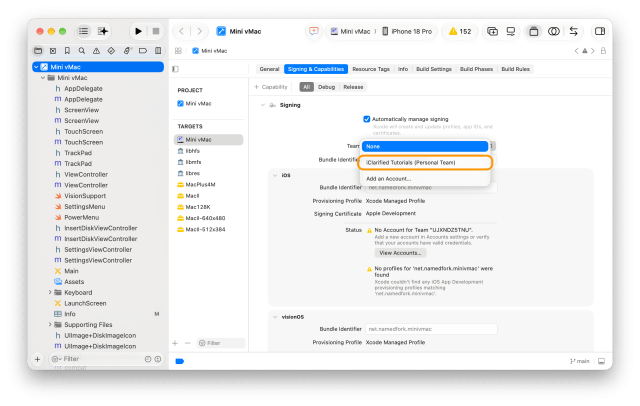
Leave Automatically manage signing on, click the Team menu and choose your account's (Personal Team).
Step Five: Change the Bundle Identifier
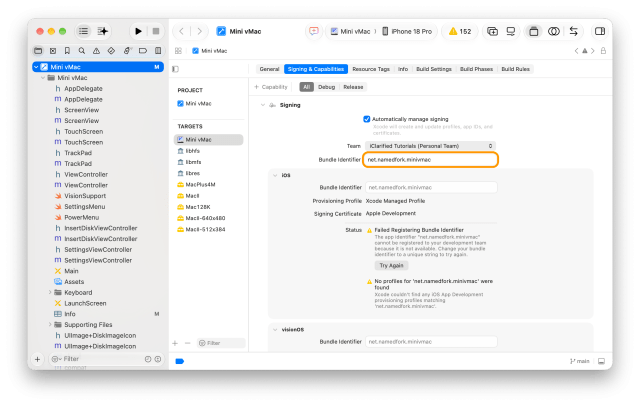
Xcode can't register the developer's bundle identifier to your team, and says so under Signing. Click the Bundle Identifier field and change it to something unique, like com.yourname.minivmac, then press Return. The error clears once Xcode has made a profile for it.
Step Six: Pair Your iPhone
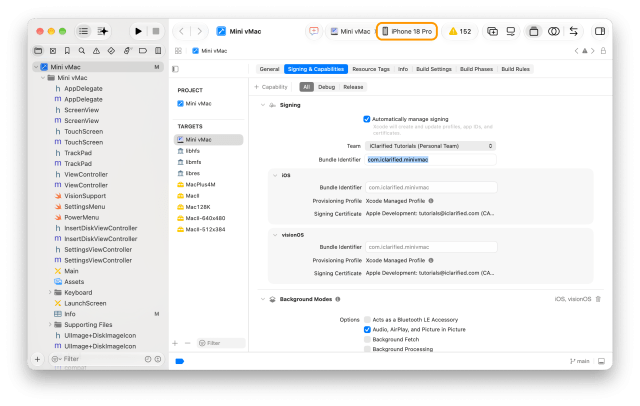
Click the run destination in the toolbar and choose Manage Devices…. In Device Hub, click the + button and choose Pair Nearby Device….
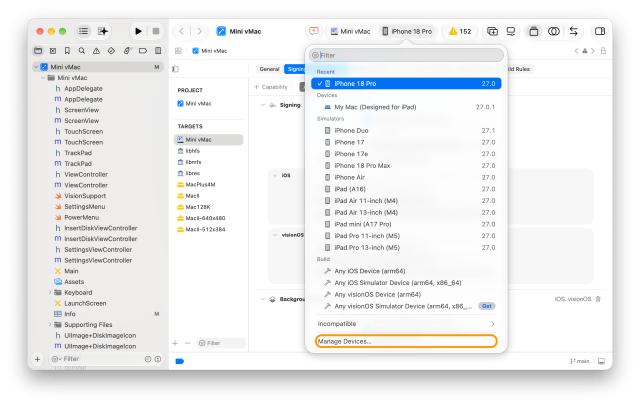
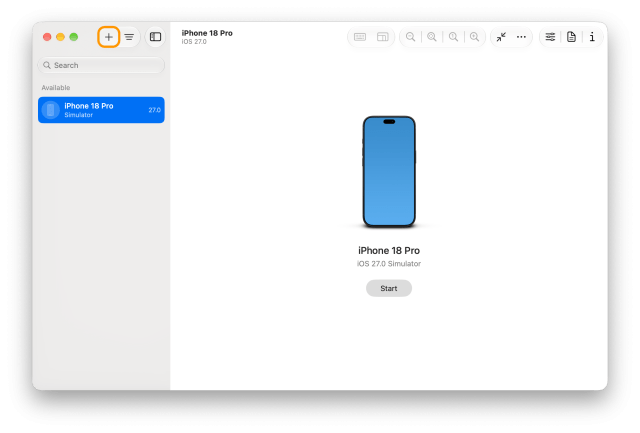
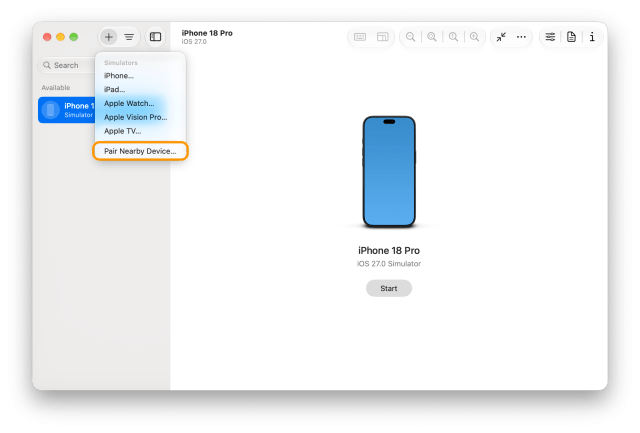
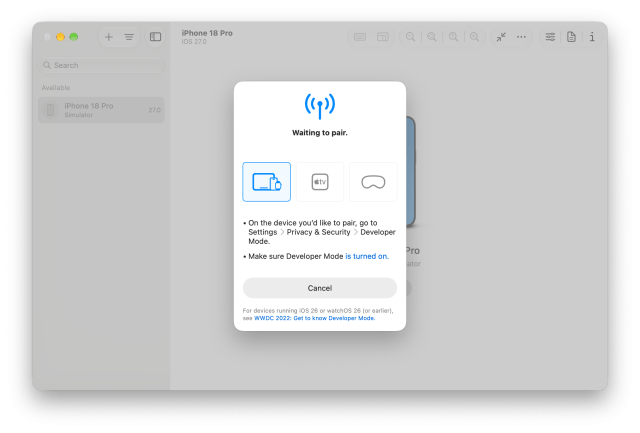
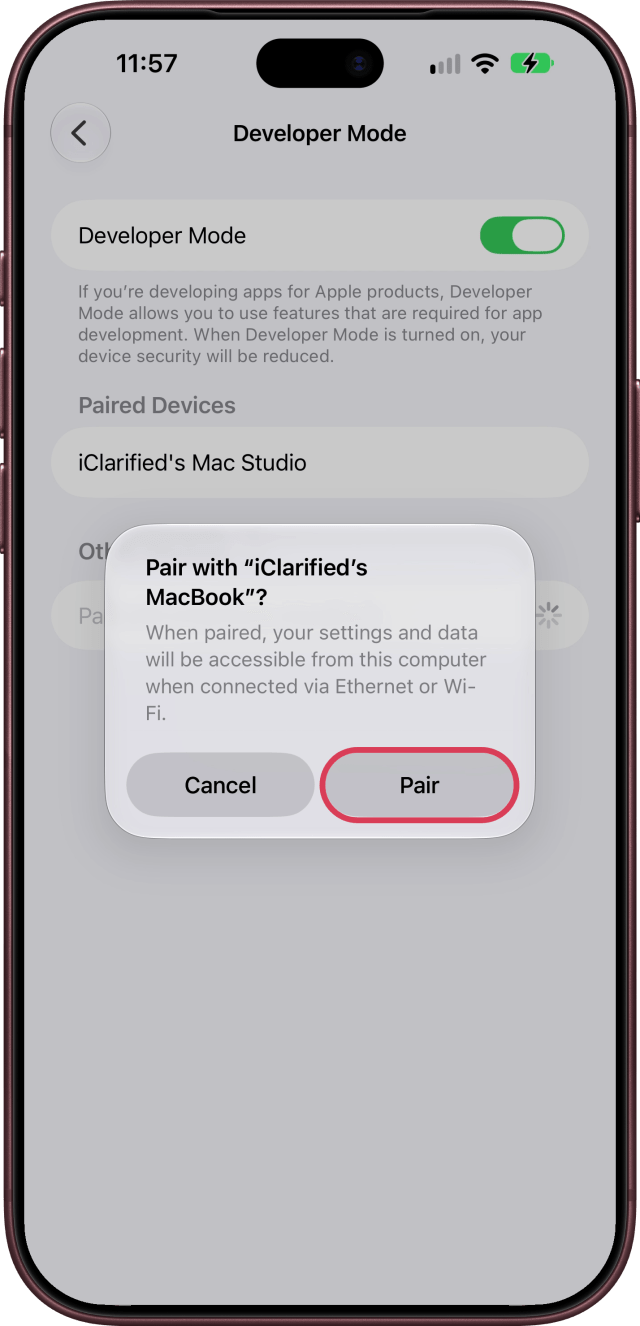
On your iPhone, open Settings and tap Privacy & Security, then scroll down and tap Developer Mode. If it's off, turn it on and restart your iPhone when asked (how to turn on Developer Mode).
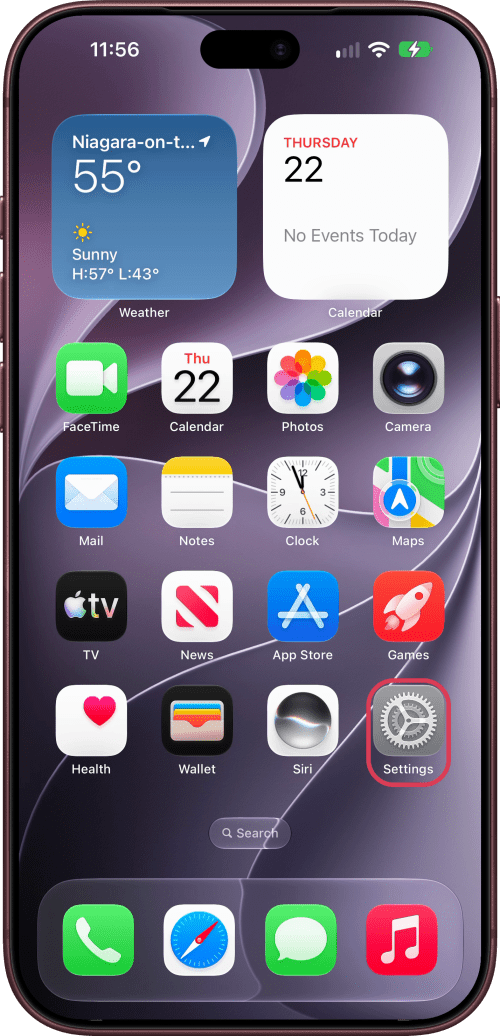
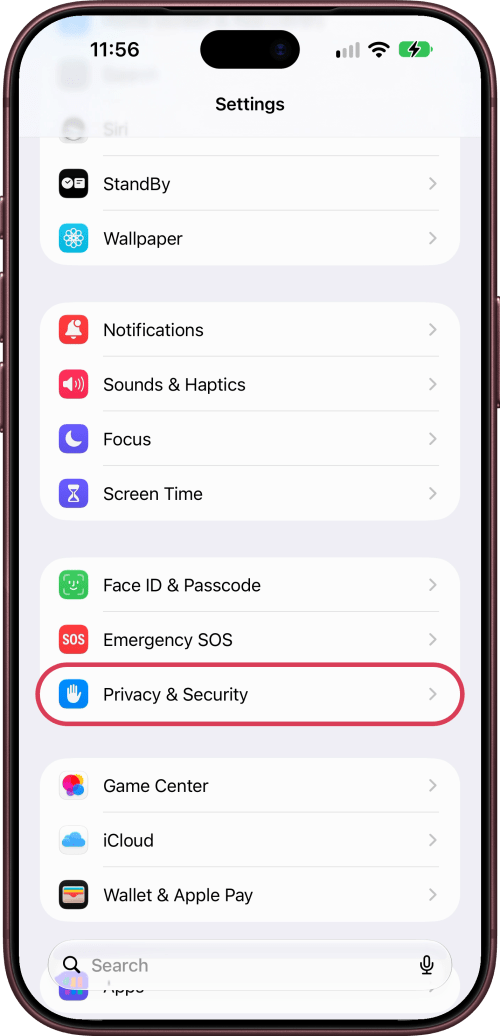
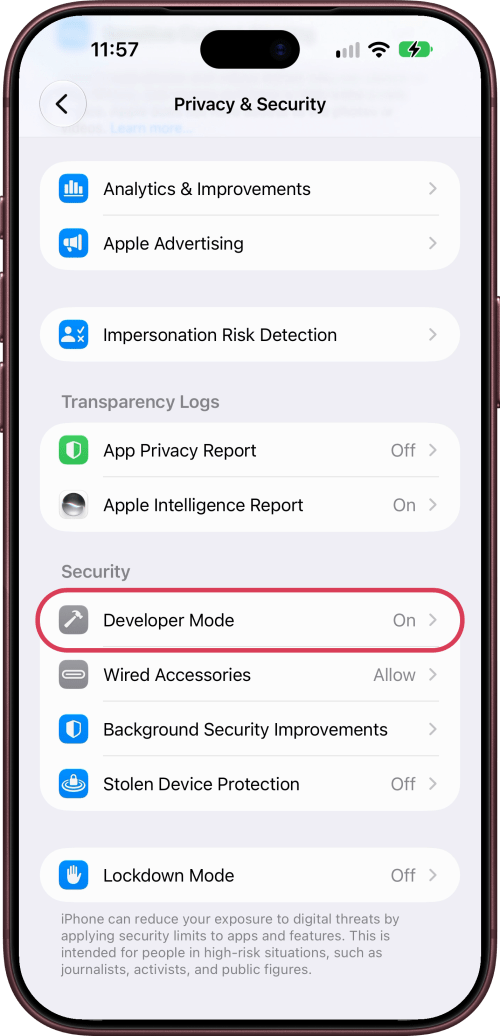
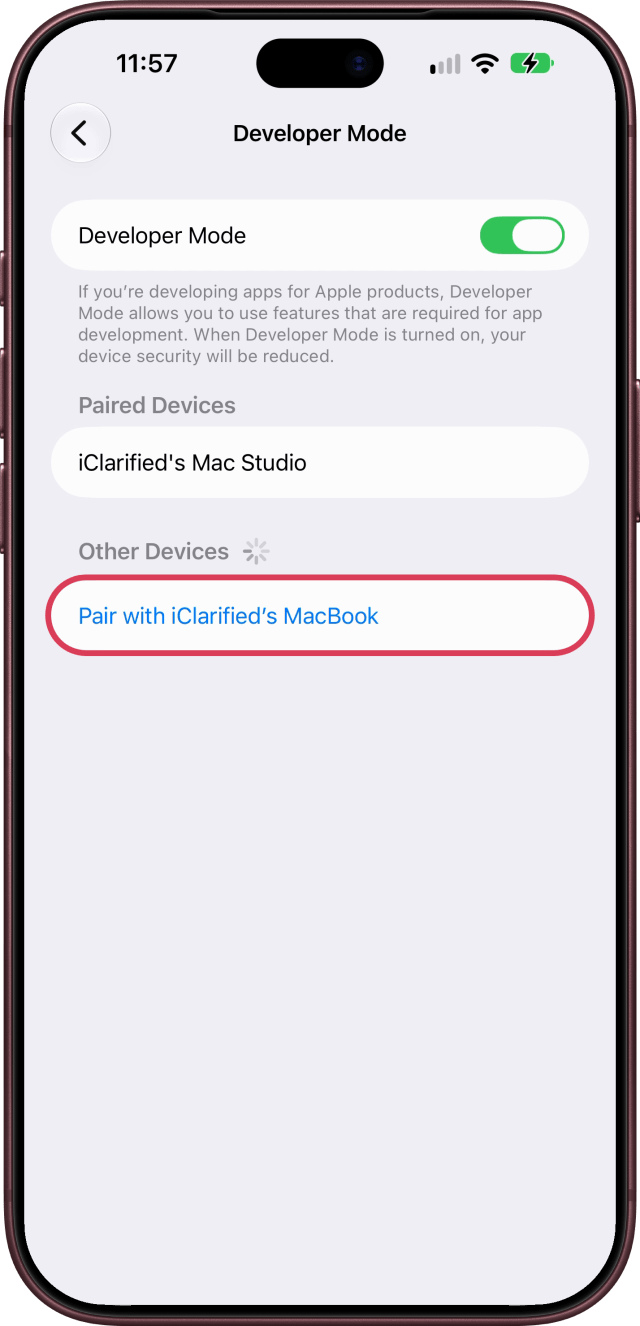
Under Other Devices, tap your Mac, then Pair, and enter the six-digit code your Mac shows.
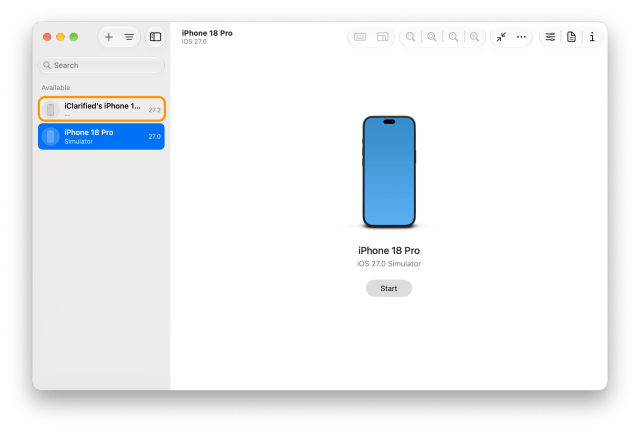
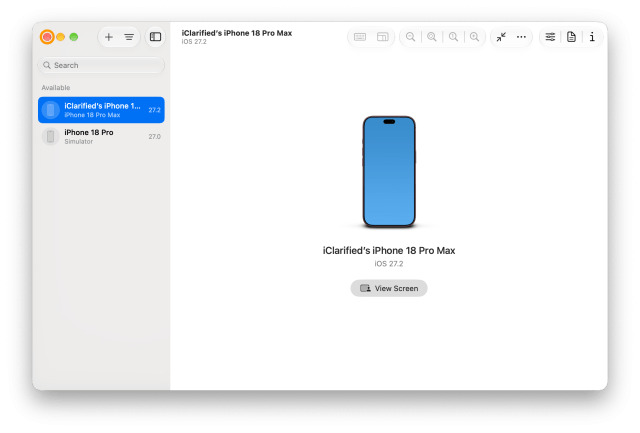
On your Mac, click your iPhone in Device Hub's sidebar, then close Device Hub. Xcode lists the iPhone as a run destination once it's selected there. Pairing by cable works too: connect the iPhone and tap Trust on it.
Step Seven: Run the App on Your iPhone
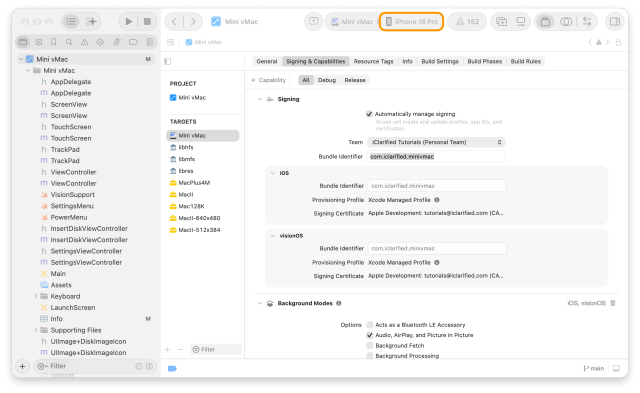
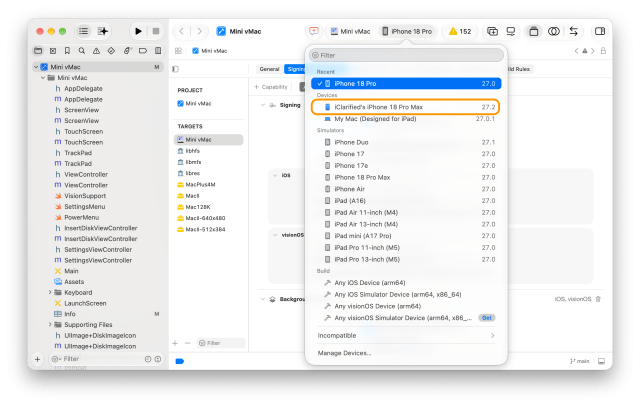
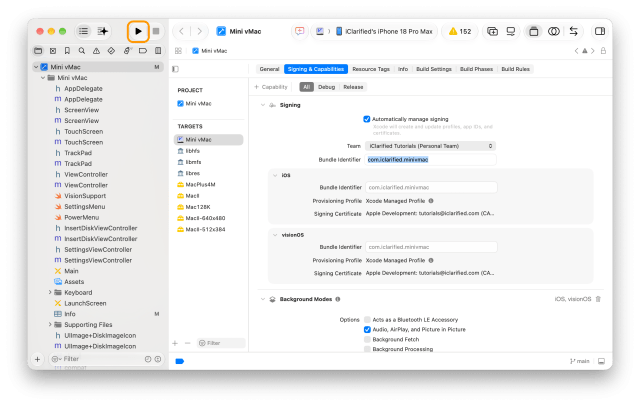
Click the run destination again, choose your iPhone and click Run. The first time, Xcode copies files from your iPhone, which can take several minutes. It then installs the app and says it couldn't launch it, because your iPhone doesn't trust the developer yet.
Step Eight: Trust the Developer on Your iPhone
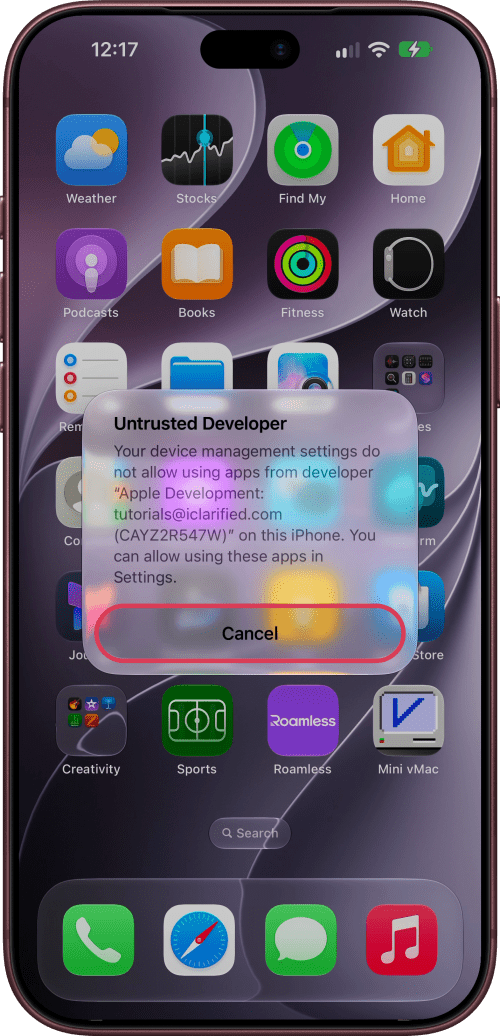
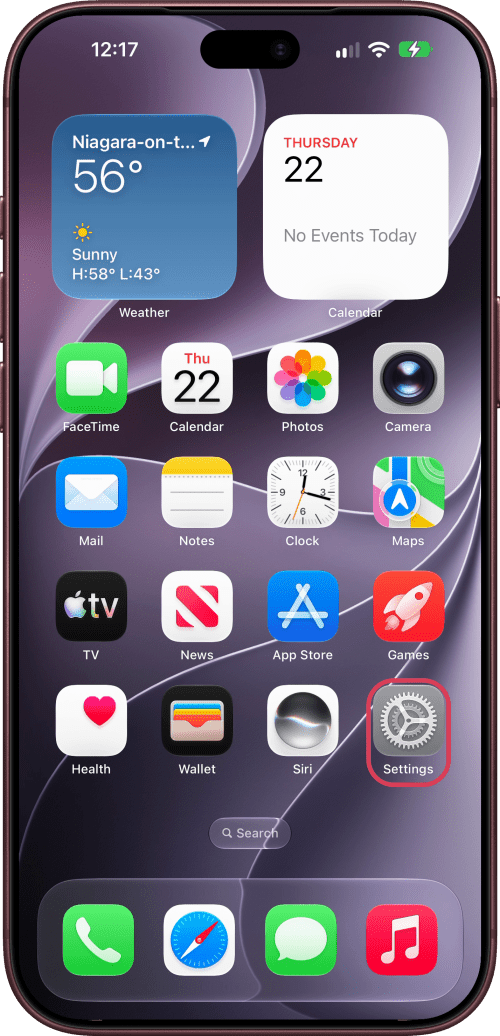
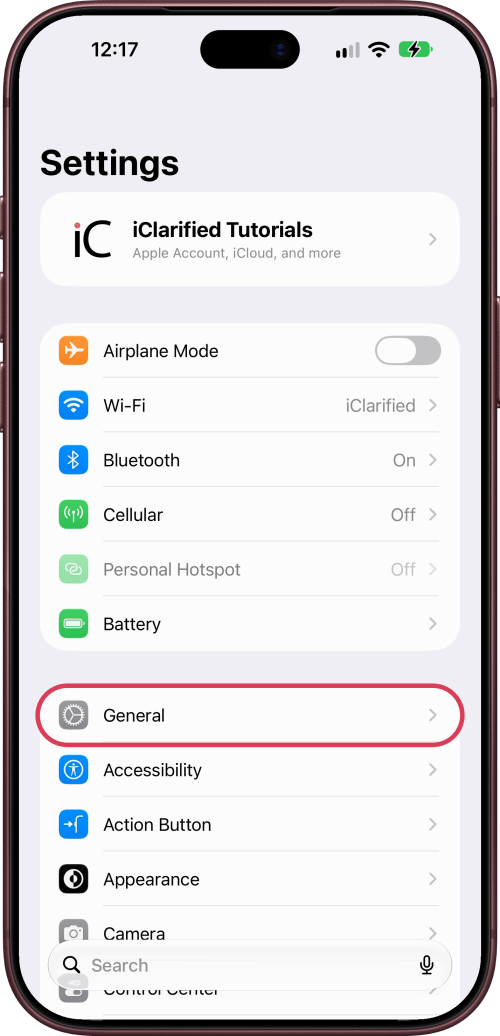
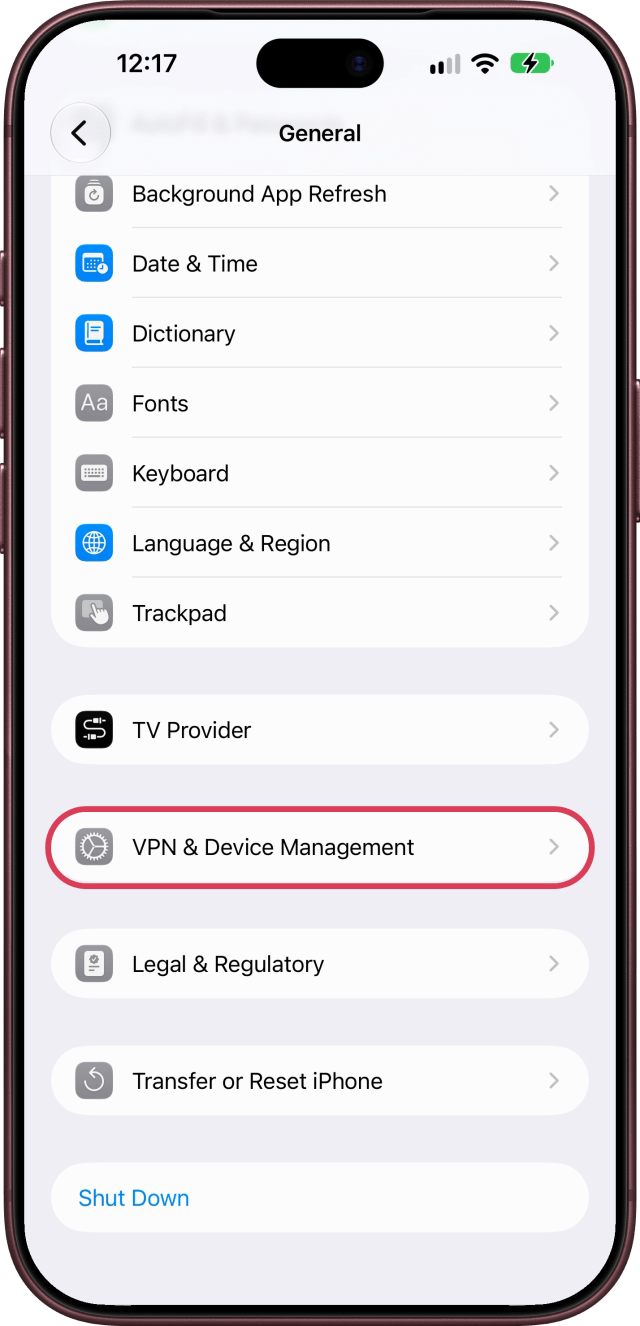
If you open the app now, your iPhone shows Untrusted Developer; tap Cancel. Open Settings, tap General, scroll down and tap VPN & Device Management.
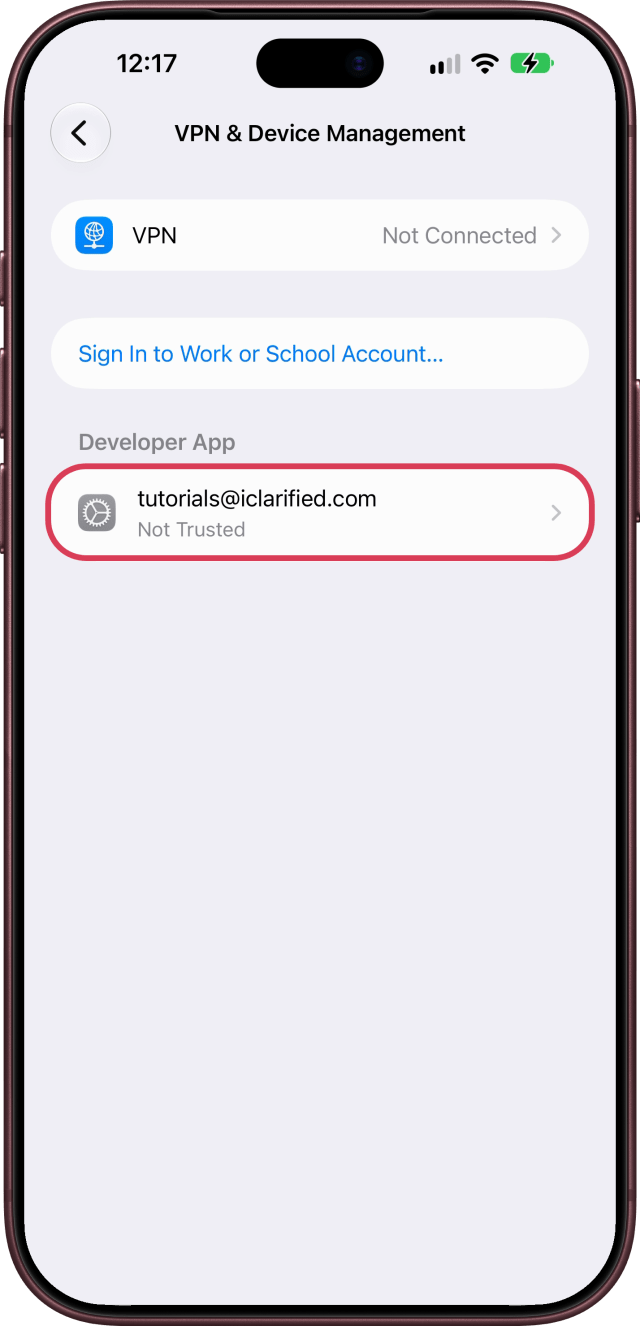
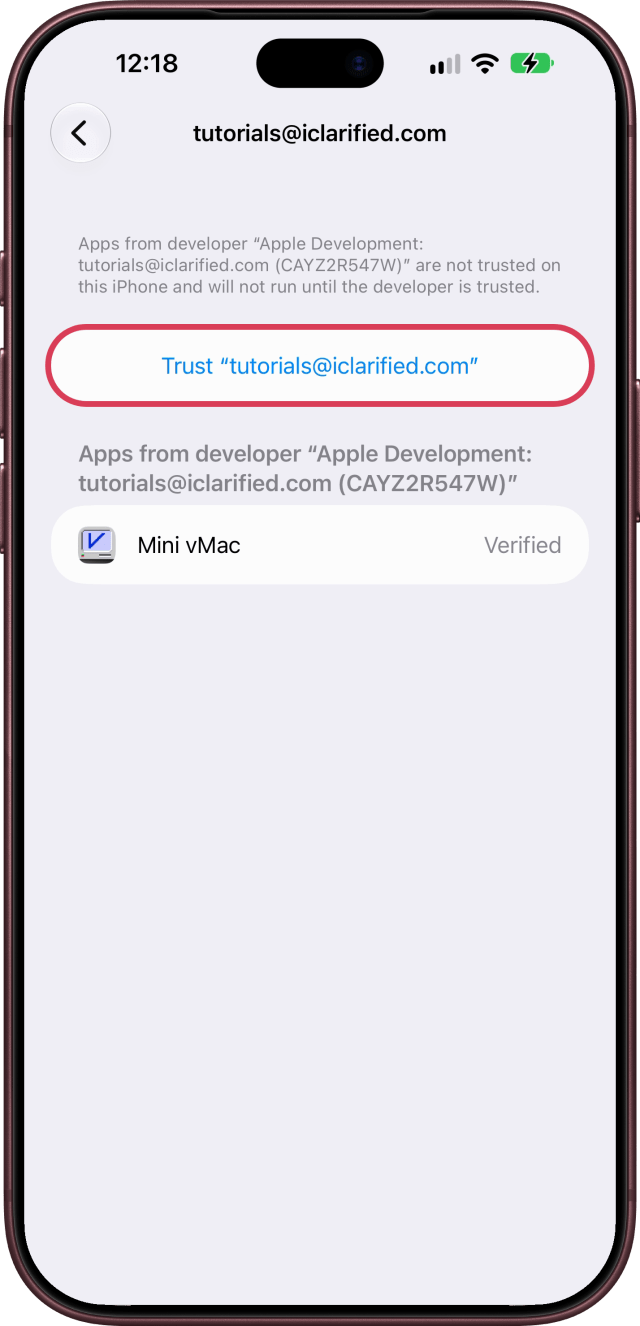
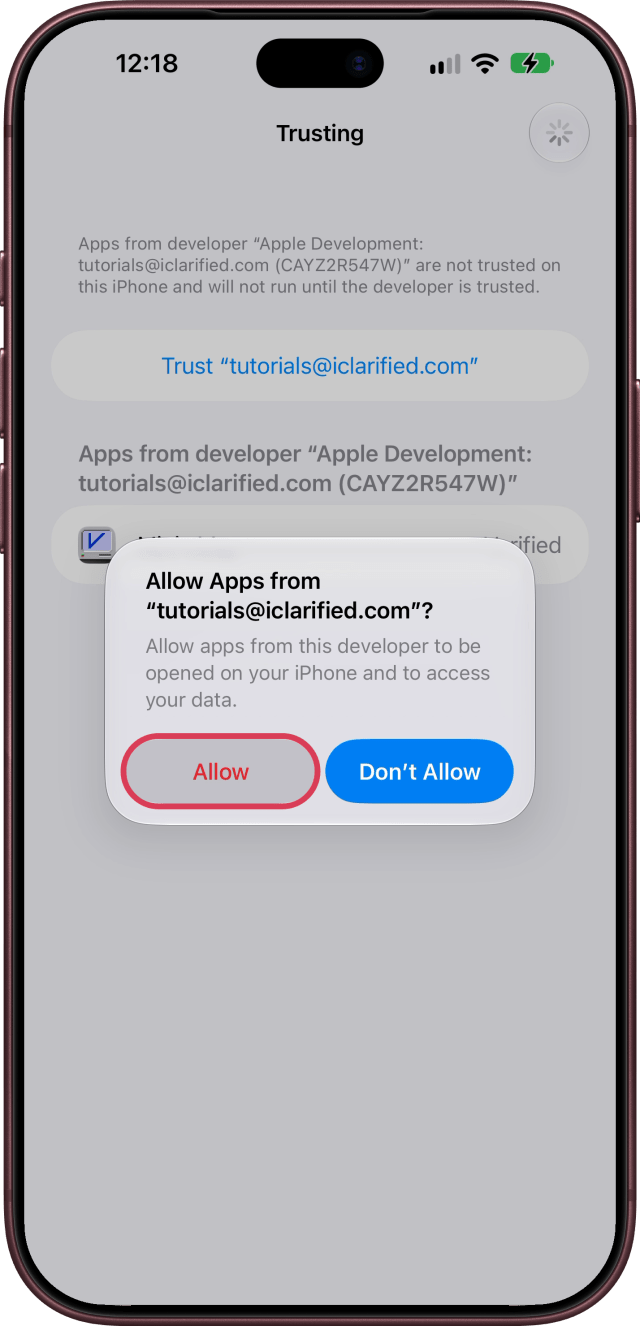
Tap your account under Developer App, then tap Trust and Allow.
Step Nine: Open the App
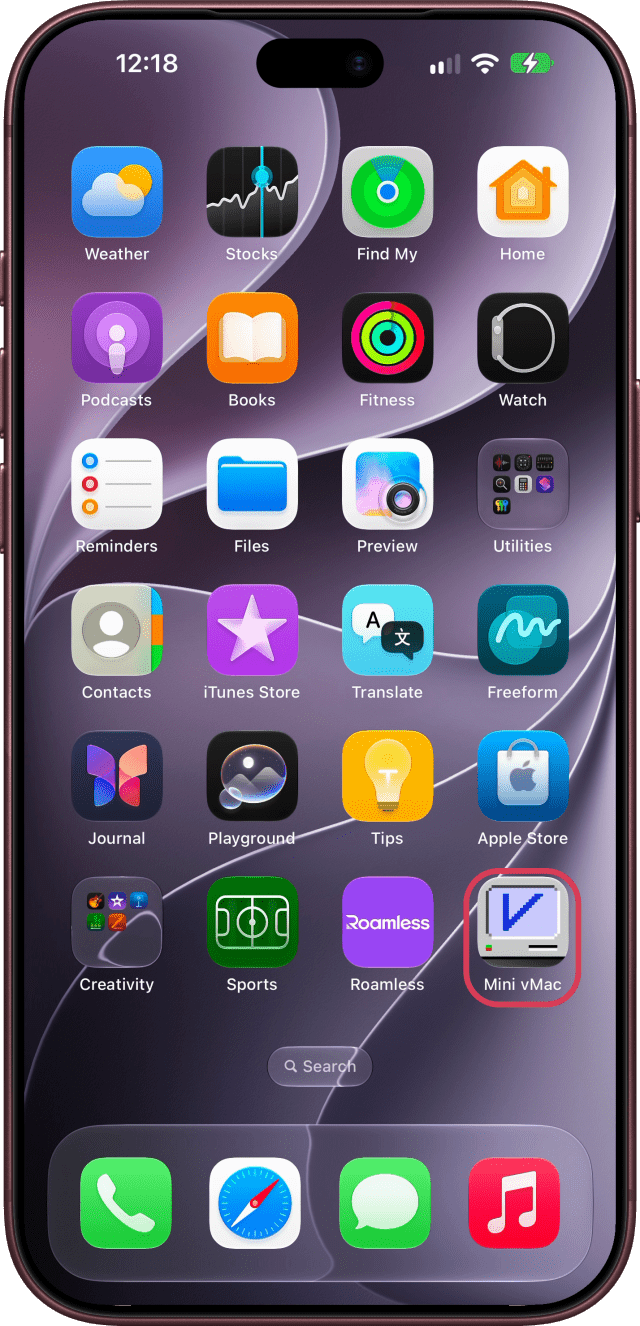
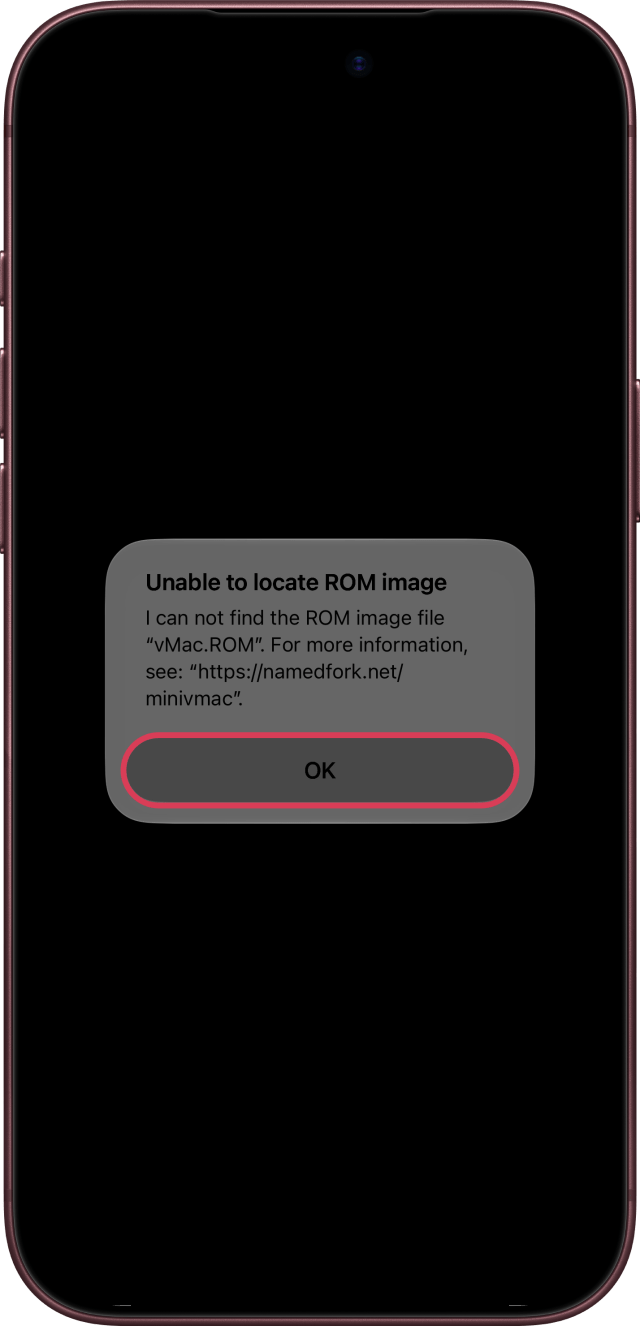
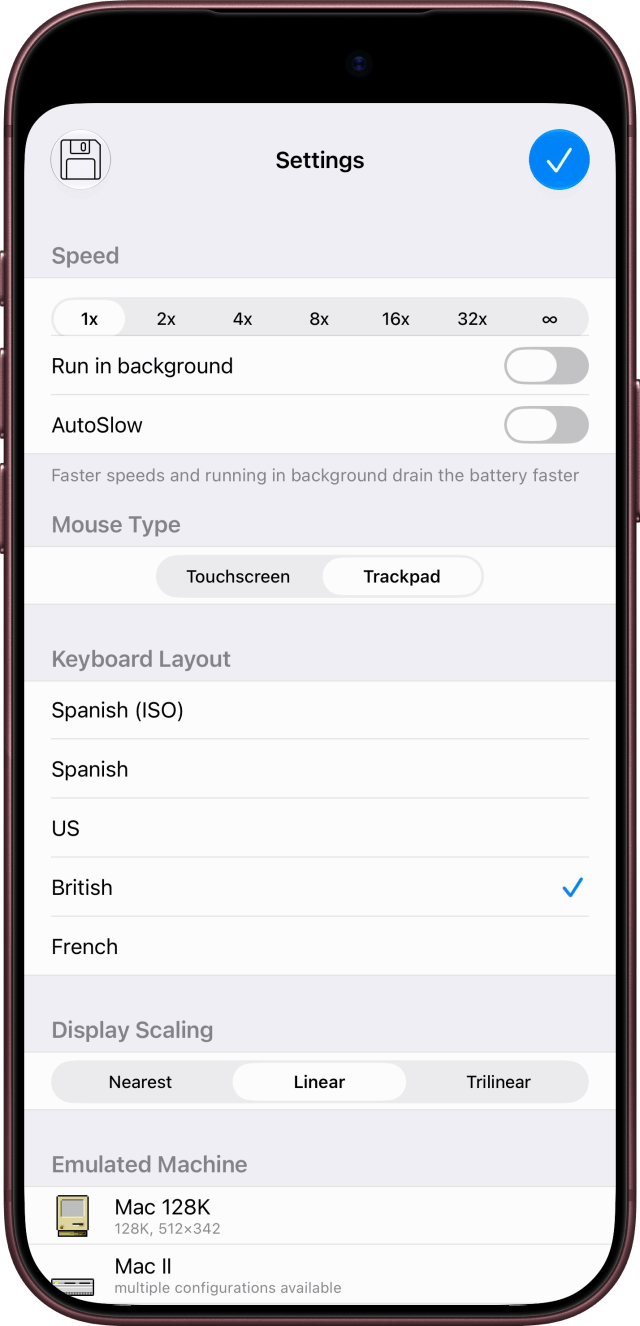
Open the app from your Home Screen. Mini vMac needs a ROM from a real Mac before it can start one, so it shows an alert first; tap OK. Swipe right with two fingers to see its settings.
Keep a Sideloaded App Working
With a free Apple Account, the app stops opening after seven days, and you can have three of these apps installed at a time. To keep using it, connect your iPhone to Xcode and click Run again: Xcode makes a new profile and reinstalls the app.