These are instructions on how to create an iPhone Applications Bundle using iBuilder. This app lets you bundle multiple applications together for easy quick installation on your iPhone.
Currently you will need to run iBuilder on a Windows machine and then copy the created bundle over to PwnageTool (Mac) for use.
Step One
Download iBuilder from here to your desktop.
Step Two
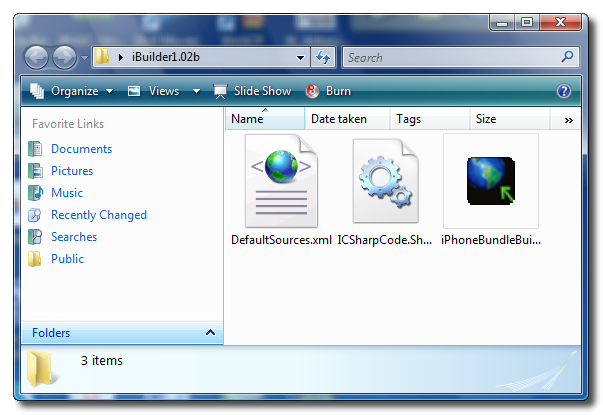
Extract the downloaded zip (iBundle1.02b.zip) to your desktop.


Step Three
Double click iPhoneBundleBuilder.exe from the extracted folder (iBundle1.02b).


Step Four
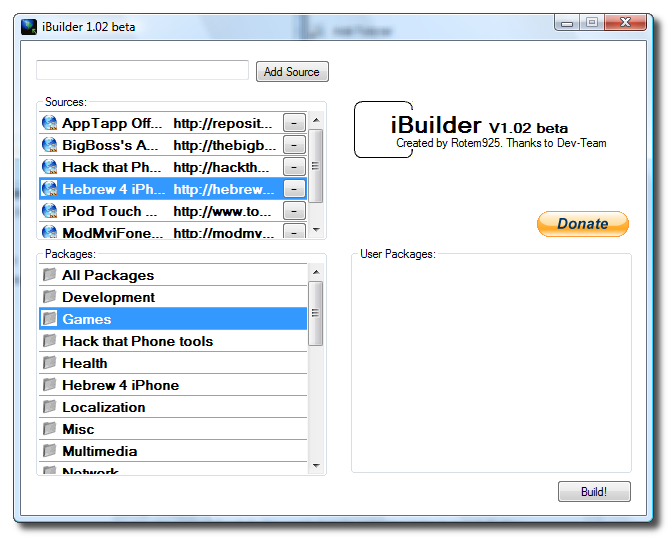
iBuilder will launch and display a list of sources and packages


Step Five
To add a source enter its url into the entryfield then click the Add Source button.
Step Six
Notice the new source is added to the Sources listbox.
Step Seven
Double click a package to add it to the User Packages listbox. Once you have added all the packages you desire, click the Build! button.
Step Eight
When your custom bundle has been built it will be saved to the Desktop in a folder called iBuilder.bundle. Click the OK button.
MAC USERS
To use this bundle you must transfer it to your Mac. Hold down the CTRL key and click the PwnageTool icon. Click Show Package Contents from the popup menu.
Now navigate to Contents > Resources > InternalPackages and copy the iBuilder.bundle into it.
You can now follow this tutorial to not only add custom logos to your firmware but also include the iBuilder.bundle
THANKS***: A big thanks to Rotem925 for creating this application. You can support his work using the donate button in iBuilder!
Currently you will need to run iBuilder on a Windows machine and then copy the created bundle over to PwnageTool (Mac) for use.
Step One
Download iBuilder from here to your desktop.
Step Two
Extract the downloaded zip (iBundle1.02b.zip) to your desktop.


Step Three
Double click iPhoneBundleBuilder.exe from the extracted folder (iBundle1.02b).


Step Four
iBuilder will launch and display a list of sources and packages


Step Five
To add a source enter its url into the entryfield then click the Add Source button.
Step Six
Notice the new source is added to the Sources listbox.
Step Seven
Double click a package to add it to the User Packages listbox. Once you have added all the packages you desire, click the Build! button.
Step Eight
When your custom bundle has been built it will be saved to the Desktop in a folder called iBuilder.bundle. Click the OK button.
MAC USERS
To use this bundle you must transfer it to your Mac. Hold down the CTRL key and click the PwnageTool icon. Click Show Package Contents from the popup menu.
Now navigate to Contents > Resources > InternalPackages and copy the iBuilder.bundle into it.
You can now follow this tutorial to not only add custom logos to your firmware but also include the iBuilder.bundle
THANKS***: A big thanks to Rotem925 for creating this application. You can support his work using the donate button in iBuilder!
