These are instructions on how to setup an email account on your Mac using Apple Mail.
Before you begin you will need to know your incoming and outgoing mail server address, your username, your password, and your authentication type. You can get this information from your Internet Server Provider or whoever provides you with your email account.
Step One
Click to launch Mail from the dock. You can also find mail in your Applications folder.


Step Two
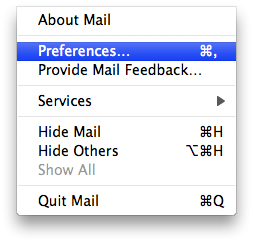
Select Preferences from the Mail Menu.


Step Three
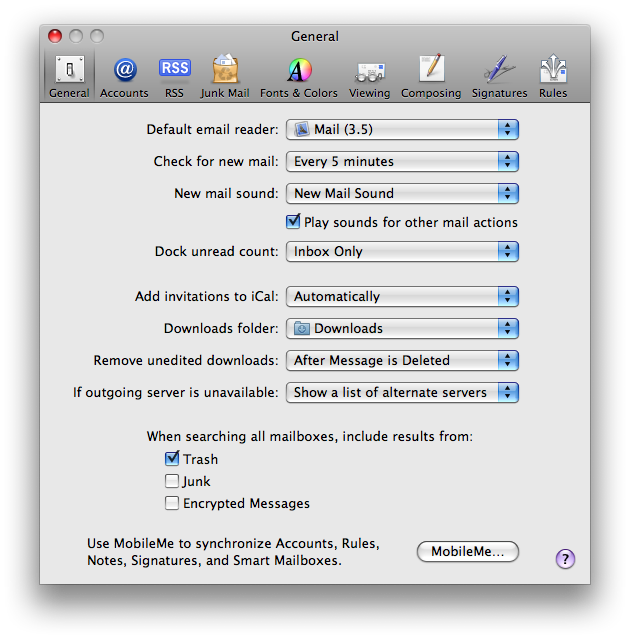
Click to select the Accounts tab from the top of the Preferences Window.


Step Four
Click the + button at the bottom left of the window to begin adding a new account.
Step Five
Input your Full Name, Email Address, and Email Account Password into the Add Account window. Click the Continue button to continue.
Step Six
Select the type of Mail account you will be using from the Account Type dropdown. Apple Mail supports POP, IMAP, and Exchange email accounts.
Step Seven
Enter a Description, Incoming Mail Server Address, Username, and Password for your mail account. Then click the Continue button to continue.
NOTE: If you have multiple email accounts the description field will be used to identify your different inboxes.
Step Eight
You will now be asked about your Incoming Mail Security settings. Most mail servers support SSL for secure authentication. The most common authentication method is Password. Click Continue to proceed.
Step Nine
You will now be asked for your Outgoing Mail Server information. Enter a Description and Outgoing Mail Server address. If your mail server requires authentication for sending emails check Use Authentication then enter a Username and Password. Click Continue to proceed.
Note: Check Use only this server if you do not want any other mail server used to send emails from this mail account.
Step Ten
Next you will be asked to set the Outgoing Mail Security settings. Most mail servers support SSL for secure authentication. The most common authentication method is Password. Click Continue to proceed.
Step Eleven
Finally you will be asked to confirm the account settings you've inputed. If you would like the account to go live immediately select Take account online then click the Create button.
Step Twelve
Notice the Accounts Preferences Window now shows your new account. You can use the sub tabs to tweak account settings.
Step Thirteen
You can use the Mailbox Behaviors sub tab to:
- set whether notes are stored in the Inbox
- set when sent messages are erased
- set how often junk messages are erased
- set whether deleted messages are moved to a separate folder and the timeframe in which they are erased
Step Fourteen
The Advanced sub tab lets you:
- enable or disable the account
- choose whether the account is included when Mail automatically checks for new messages
- set how long messages are left on the server
- choose whether to be prompted to skip messages over a specific size
- set the incoming port number
- set the authentication method and security
Step Fifteen
Once all the settings are to your liking you can use the Get Mail button to download messages from your mail server.
Before you begin you will need to know your incoming and outgoing mail server address, your username, your password, and your authentication type. You can get this information from your Internet Server Provider or whoever provides you with your email account.
Step One
Click to launch Mail from the dock. You can also find mail in your Applications folder.


Step Two
Select Preferences from the Mail Menu.


Step Three
Click to select the Accounts tab from the top of the Preferences Window.


Step Four
Click the + button at the bottom left of the window to begin adding a new account.
Step Five
Input your Full Name, Email Address, and Email Account Password into the Add Account window. Click the Continue button to continue.
Step Six
Select the type of Mail account you will be using from the Account Type dropdown. Apple Mail supports POP, IMAP, and Exchange email accounts.
Step Seven
Enter a Description, Incoming Mail Server Address, Username, and Password for your mail account. Then click the Continue button to continue.
NOTE: If you have multiple email accounts the description field will be used to identify your different inboxes.
Step Eight
You will now be asked about your Incoming Mail Security settings. Most mail servers support SSL for secure authentication. The most common authentication method is Password. Click Continue to proceed.
Step Nine
You will now be asked for your Outgoing Mail Server information. Enter a Description and Outgoing Mail Server address. If your mail server requires authentication for sending emails check Use Authentication then enter a Username and Password. Click Continue to proceed.
Note: Check Use only this server if you do not want any other mail server used to send emails from this mail account.
Step Ten
Next you will be asked to set the Outgoing Mail Security settings. Most mail servers support SSL for secure authentication. The most common authentication method is Password. Click Continue to proceed.
Step Eleven
Finally you will be asked to confirm the account settings you've inputed. If you would like the account to go live immediately select Take account online then click the Create button.
Step Twelve
Notice the Accounts Preferences Window now shows your new account. You can use the sub tabs to tweak account settings.
Step Thirteen
You can use the Mailbox Behaviors sub tab to:
- set whether notes are stored in the Inbox
- set when sent messages are erased
- set how often junk messages are erased
- set whether deleted messages are moved to a separate folder and the timeframe in which they are erased
Step Fourteen
The Advanced sub tab lets you:
- enable or disable the account
- choose whether the account is included when Mail automatically checks for new messages
- set how long messages are left on the server
- choose whether to be prompted to skip messages over a specific size
- set the incoming port number
- set the authentication method and security
Step Fifteen
Once all the settings are to your liking you can use the Get Mail button to download messages from your mail server.

