These are instructions on how to install Windows Vista on your Mac using VMware Fusion.
If you would like to install Windows XP on your Mac you can follow these instructions as they will be very similar; however, the screenshots will not match exactly.
Step One
Purchase VMware Fusion for Mac from here. Note*: You can also get a 30 day trial
Step Two
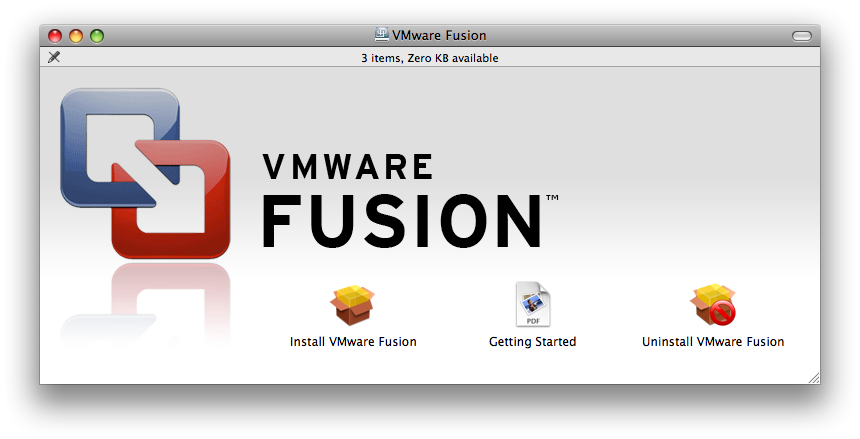
After purchasing VMware Fusion you will be able to download the VMware Fusion dmg file or you will receive a CD in the mail. Insert the CD or double click the downloaded dmg file to mount it.
Step Three
Double click the Install VMware Fusion icon.


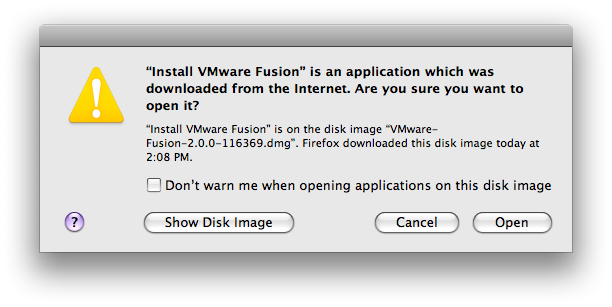
You may be warned that the application was downloaded from the Internet. Click the Open button.


You will be informed that this package contains a program that determines if the software can be installed. Click the Continue button.
The VMware Fusion Installer will open. Click the Continue button.
Read the software license agreement and click the Continue button.
You will then be asked to accept the agreement by clicking the Agree button.
For Virtual Disk Support you will need to install MacFUSE. Check the selectbox next to Install MacFUSE version 1.5.1 then click the Continue button.
You may be asked to enter your administrative username and password. Do this then click the OK button.
Click the Install button to begin installation on your primary hard drive. If you would like to select a direct install location you can click the Change Install Location... button.
You may be asked to enter your administrative username and password. Do this then click the OK button.
Please locate the Serial number you received for VMware Fusion and enter it into the Serial Number textfield. Click the Continue button to proceed.
VMware Fusion will now install. Once installation has finished click the Close button.
Step Four
The installation will now open VMware Fusion. If it didn't you can launch the program from your Applications folder. Click the New button at the bottom left of the Virtual Machine Library Window.
The New Virtual Machine Assistant will ask you to to insert your installation CD.
Insert the Windows Vista Installation CD and click the Continue button.
You will now be asked to setup an Account Name and Password. You will also need to enter your Vista serial number and select Use Easy Install. When done entering this information click the Continue button.
Select the Sharing options you would like for your Vista Installation. I chose to Share home folder and Share home folder with read and write access. This will allow me to access my Mac home folder from inside Vista. Click the Continue button when you are done.
You will now be asked to review the settings for the Virtual Machine. If you would like to customize anything you can click the Customize Settings button. Otherwise click the Finish button.
Choose a location for the virtual machine to be saved then click the Save button.
Step Five
Windows will now begin to load files...
The GUI will load and Windows will start expanding files
Windows will then ask you to login using the account you created during setup.
VMWare Fusion will automatically begin installing VMWare Tools. Once this is finished Windows will automatically reboot.
Step Six
Vista will log you out and bring you back to the login screen. Login one last time and you will have now successfully installed Windows Vista on your Mac!
If you would like to install Windows XP on your Mac you can follow these instructions as they will be very similar; however, the screenshots will not match exactly.
Step One
Purchase VMware Fusion for Mac from here. Note*: You can also get a 30 day trial
Step Two
After purchasing VMware Fusion you will be able to download the VMware Fusion dmg file or you will receive a CD in the mail. Insert the CD or double click the downloaded dmg file to mount it.
Step Three
Double click the Install VMware Fusion icon.


You may be warned that the application was downloaded from the Internet. Click the Open button.


You will be informed that this package contains a program that determines if the software can be installed. Click the Continue button.
The VMware Fusion Installer will open. Click the Continue button.
Read the software license agreement and click the Continue button.
You will then be asked to accept the agreement by clicking the Agree button.
For Virtual Disk Support you will need to install MacFUSE. Check the selectbox next to Install MacFUSE version 1.5.1 then click the Continue button.
You may be asked to enter your administrative username and password. Do this then click the OK button.
Click the Install button to begin installation on your primary hard drive. If you would like to select a direct install location you can click the Change Install Location... button.
You may be asked to enter your administrative username and password. Do this then click the OK button.
Please locate the Serial number you received for VMware Fusion and enter it into the Serial Number textfield. Click the Continue button to proceed.
VMware Fusion will now install. Once installation has finished click the Close button.
Step Four
The installation will now open VMware Fusion. If it didn't you can launch the program from your Applications folder. Click the New button at the bottom left of the Virtual Machine Library Window.
The New Virtual Machine Assistant will ask you to to insert your installation CD.
Insert the Windows Vista Installation CD and click the Continue button.
You will now be asked to setup an Account Name and Password. You will also need to enter your Vista serial number and select Use Easy Install. When done entering this information click the Continue button.
Select the Sharing options you would like for your Vista Installation. I chose to Share home folder and Share home folder with read and write access. This will allow me to access my Mac home folder from inside Vista. Click the Continue button when you are done.
You will now be asked to review the settings for the Virtual Machine. If you would like to customize anything you can click the Customize Settings button. Otherwise click the Finish button.
Choose a location for the virtual machine to be saved then click the Save button.
Step Five
Windows will now begin to load files...
The GUI will load and Windows will start expanding files
Windows will then ask you to login using the account you created during setup.
VMWare Fusion will automatically begin installing VMWare Tools. Once this is finished Windows will automatically reboot.
Step Six
Vista will log you out and bring you back to the login screen. Login one last time and you will have now successfully installed Windows Vista on your Mac!

